From Code to Cloud: Mastering Full-Stack Deployment with Docker, Kubernetes, and AWS

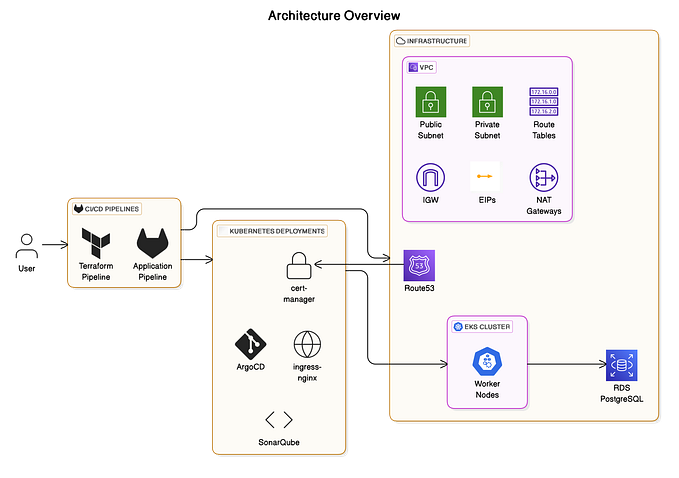
In this tutorial, we’ll walk you through the process of containerizing a multi-tier application and deploying it using Kubernetes, Docker, AWS ECR, and AWS ELB. We’ll use a Task Manager Application as our example, highlighting the internal architecture and the steps involved in creating and deploying the application.
Tools Explored:
- Terraform & AWS CLI for AWS infrastructure
- Terraform, Kubectl, and more for CI/CD setup
- Helm, Prometheus, and Grafana for Monitoring
High-Level Overview:
- IAM User setup & Terraform magic on AWS
- EKS Cluster creation & Load Balancer configuration
- Private ECR repositories for secure image management
- Helm charts for efficient monitoring setup
The journey covered everything from setting up tools to deploying a Three-Tier app, ensuring data persistence, and implementing CI/CD pipelines.
Introduction
Deploying modern applications often involves multiple components, each with its own set of dependencies and configurations. Containerization and orchestration tools like Docker and Kubernetes make it easier to manage these complexities. AWS ECR (Elastic Container Registry) and AWS ELB (Elastic Load Balancer) further simplify the deployment and scaling process.
In this guide, we’ll cover:
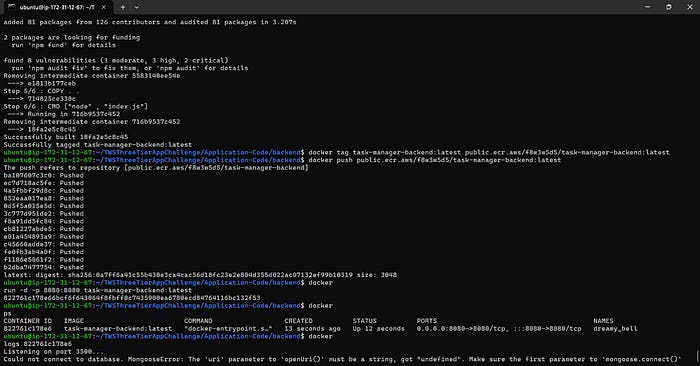
- Setting up Docker containers for the frontend, backend, and database.
- Pushing Docker images to AWS ECR.
- Deploying a Kubernetes cluster.
- Configuring an Ingress controller and ELB for load balancing.
Prerequisites
- Basic knowledge of Docker and Kubernetes.
- AWS account with permissions to create ECR repositories, EKS clusters, and IAM roles.
- Node.js and React.js projects for the backend and frontend, respectively.
- MongoDB database setup.
Step 1: IAM Setup
- Create a user
eks-adminwithAdministratorAccess. - Generate Security Credentials: Access Key and Secret Access Key.
Step 2: EC2 Setup
- Launch an Ubuntu instance in your favourite region (eg. region
ap-south-1) - This EC2 instance would act as governing instance and all our docker containers would be deployed to AWS ECR from here.
- SSH into the instance from your local machine.

Step 3: Install AWS CLI v2
curl "https://awscli.amazonaws.com/awscli-exe-linux-x86_64.zip" -o "awscliv2.zip"
sudo apt install unzip
unzip awscliv2.zip
sudo ./aws/install -i /usr/local/aws-cli -b /usr/local/bin --update
aws configure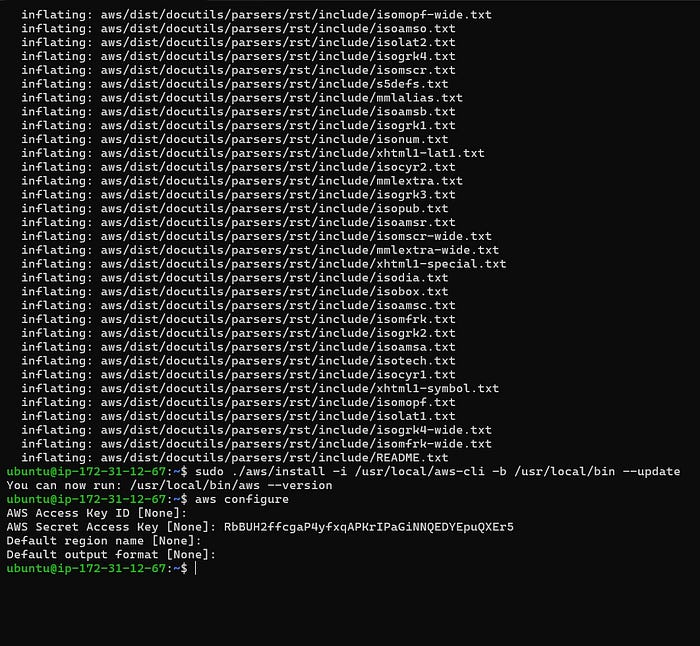
Step 4: Install Docker
In this step, we will install Docker into our EC2 instance.
sudo apt-get update
sudo apt install docker.io
docker ps
sudo chown $USER /var/run/docker.sock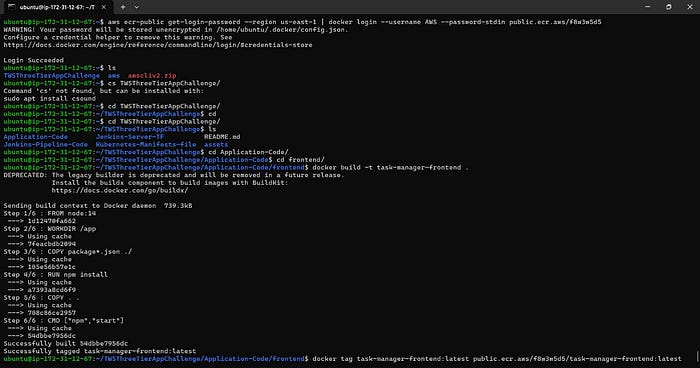
Step 5: Install kubectl
curl -o kubectl https://amazon-eks.s3.us-west-2.amazonaws.com/1.19.6/2021-01-05/bin/linux/amd64/kubectl
chmod +x ./kubectl
sudo mv ./kubectl /usr/local/bin
kubectl version --short --client
Step 6: Install eksctl
curl --silent --location "https://github.com/weaveworks/eksctl/releases/latest/download/eksctl_$(uname -s)_amd64.tar.gz" | tar xz -C /tmp
sudo mv /tmp/eksctl /usr/local/bin
eksctl version
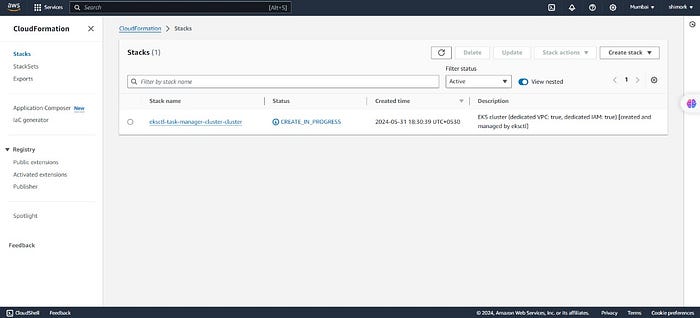
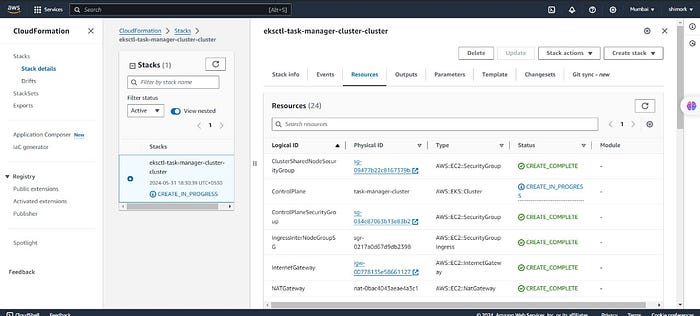
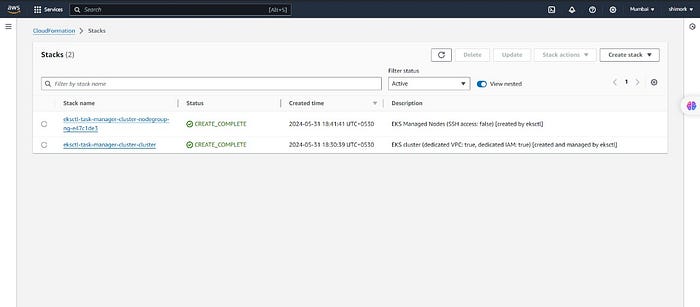
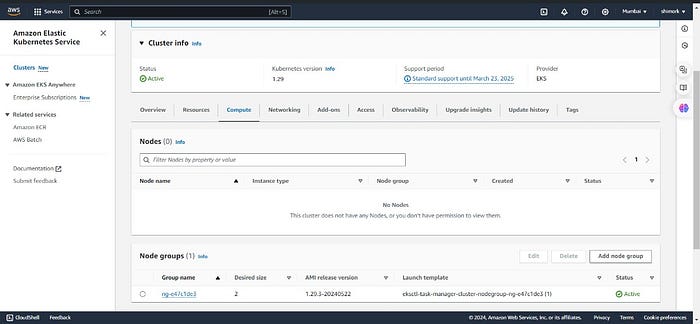
Step 7: Setup EKS Cluster
eksctl create cluster --name three-tier-cluster --region us-west-2 --node-type t2.medium --nodes-min 2 --nodes-max 2
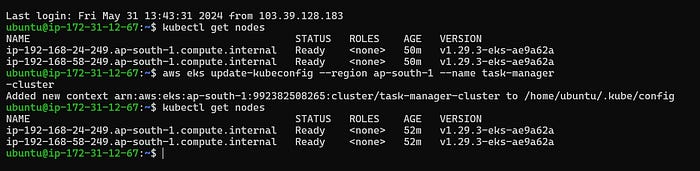
aws eks update-kubeconfig --region us-west-2 --name three-tier-cluster
kubectl get nodes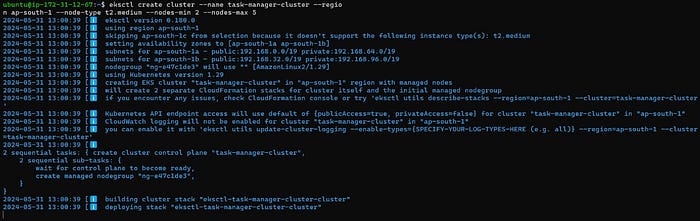

Step 8: Run Manifests
kubectl create namespace workshop
kubectl apply -f .
kubectl delete -f .
Step 9: Install AWS Load Balancer
curl -O https://raw.githubusercontent.com/kubernetes-sigs/aws-load-balancer-controller/v2.5.4/docs/install/iam_policy.json
aws iam create-policy --policy-name AWSLoadBalancerControllerIAMPolicy --policy-document file://iam_policy.json
eksctl utils associate-iam-oidc-provider --region=us-west-2 --cluster=three-tier-cluster --approve
eksctl create iamserviceaccount --cluster=three-tier-cluster --namespace=kube-system --name=aws-load-balancer-controller --role-name AmazonEKSLoadBalancerControllerRole --attach-policy-arn=arn:aws:iam::626072240565:policy/AWSLoadBalancerControllerIAMPolicy --approve --region=us-west-2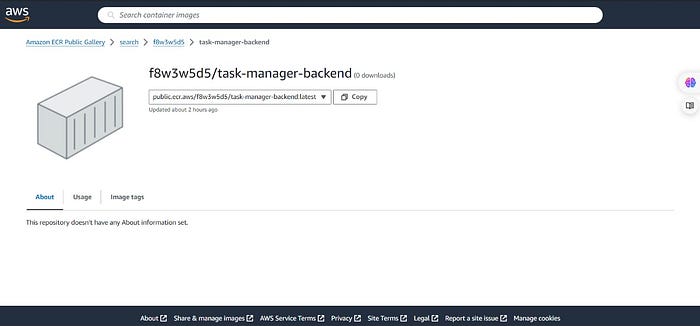
Step 10: Deploy AWS Load Balancer Controller
sudo snap install helm --classic
helm repo add eks https://aws.github.io/eks-charts
helm repo update eks
helm install aws-load-balancer-controller eks/aws-load-balancer-controller -n kube-system --set clusterName=my-cluster --set serviceAccount.create=false --set serviceAccount.name=aws-load-balancer-controller
kubectl get deployment -n kube-system aws-load-balancer-controller
kubectl apply -f full_stack_lb.yaml
Conclusion
Congratulations! You’ve successfully deployed a full-stack Task Manager Application using Docker, Kubernetes, AWS ECR, and AWS ELB. This setup ensures that your application is scalable, resilient, and easy to manage. Whether you’re deploying for development or production, this architecture provides a solid foundation for your applications.
Feel free to leave comments or questions below. Happy deploying!
Follow Shivam Maurya on Medium, for more such amazing content.